Showing posts with label recipe. Show all posts
Made Japanese Kara-age on Saturday noon and gone just like that.
My sister loves it - of course!

It is really yummy and easy.
I use the recipe from here and in fact I did not use the sake but still taste yummy.
Looking at the original picture then looking at mine, I think mine is too pale.
I should probably leave it longer to get that golden brown color.

Anyway, go try it and enjoy!

This is probably the easiest cookies recipe I've ever seen.
And it only needs 3 ingredients. YES, THREE! Unbelievable!

I was in doubt that it will taste good before making it.
But I should now, anything with Nutella taste good. Hahahahaha!

This cookies are so so yummy especially when it's still warm (not hot) cos you still get that melting Nutella inside. I suggest to put it on microwave for few seconds if you're going to eat it the next day.

Recipe is adapted from here.

However, the original recipe said to bake for 6 – 8 minutes, but I bake it for about 10-15 minutes cos I feel 8 minutes is a bit undercooked for me.
Enjoy trying and you won't regret it!
the real cookies are darker than the pic, this is affected by sun light.
So, I decided to start selling pineapple tarts or cookies or nastar or whatever you call it.
It is an Indonesian or even Asian cookies that is really popular usually during Chinese New Year but people still like to eat it for daily snack accompanied with tea :)

Here in Melbourne or Australia, we barely can find good nastar.
As my passion is in baking and cooking, I am thinking to give it a go by starting with this pineapple tart. And maybe more to come?

Anyway, I am selling this for $10 (250gr). You can always order for bigger portion and with another filling (jam or cheese). It's basically just like cookies. I will make this regularly and will also make on orders. Contact me if you are interested :)


Thanks!!!
Time for recipe post. Finally.... after a while :)
I am happy to be back, cooking and baking.

I made this when I did my housewarming 2 weeks ago.
Some of them are old recipes but never fail people's tongues.

Here is the picture taken from one of my friends as I completely forgot about taking pics. Yes, I was so busy that day!

First pic in the top left corner is the wonton beef taco, but this time I nailed it. I put more cheese and salsa sauce for more flavour, also topped with a bit of sour cream when serving it.
Recipe is still the same, 500gr mince beef, mozzarella cheese, chunky salsa sauce, taco seasoning, and wonton skin. It's all gone in 10 minutes. Love it!

The second pic is the one next to it, it's roasted asparagus and prosciutto. I got the recipe from Seasons and Suppers.
The pic below is the raw version before I roasted it.
It's served it with a slice of bread and with a cheese sauce supposedly.
But as usual, trouble always comes at the wrong time, my sauce is not thickened and my guess is I used wrong type of cheese so it didn't blend with the other ingredients.

It should look like the pic below:
pic taken from Seasons & Suppers
Third, the bottom right corner is my Oreo Cheesecake Cupcake. Yum!
You can find the recipe from my previous post.

The last picture, I did not cook that one. hehehe..
I bought it from a Malaysian restaurant as I did not have time to cook main course for 11 people ;p
It is sizzling tofu with mince chicken and it is super super super yummy!!!!!

Anw, I will have another housewarming this Saturday for my ex-colleagues so there will be more recipes here. Yeay!
Ciao!
I am back to the kitchen.
Have been away for so long cos I am too lazy to cook if it's only for me.
Hence, I decided to make something for my sister instead so at least I know someone will eat it.

I made this mac and cheese as this is one of her favorites while I personally don't like it.
I still prefer carbonara for my taste.
Ohhh... and in fact my bf likes it as well and asked me to make one for him when he is coming (soon), so I should practice first, shouldn't I?

I used the recipe from here.
They give you the tips and the videos as well which is very helpful.
But still, when I cooked it yesterday, it wasn't as simple as I thought.

I made only half recipe and it can feed 3 people already.
Thanks God it turned out not too bad so I also gave some to my friend who live across my apartment.
And Thanks God my sister likes it, even she only said 'OK' not like 'Yummy'. LOL!

All gone by evening, even the pic does not look attempting. Yeay!
Must be better for the next round.
Enjoy!


New season has come.
It's time for MasterChef Professional.

It's just week 1 but I feel the spirit is here.
I personally have not been cooking properly or even baking lately.
But watching the videos, looking at the pictures and reading the recipes from MasterChef is just.... unbearable.

I wish I have their pantry in my apartment, I will surely cook and try their recipes one by one every day.
Ahhh.. I wish!

Slow cooked beef in stout

Aromatic Golden Duck Broth Duck and Ginger dumplings with Otway Forest Shiitake mushrooms

Yabby tails Champagne butter and Yarra Valley Salmon roe
Quail two ways golden beets and pumpkin seed jus gras
Scallops with vegetable puree and apple relish
I am saliva-ing!! >.<


*Photos courtesy to MasterChef
I've been in the mood cooking savory food lately.
Time for chicken, I cooked Chicken Piccata last night.


Recipe adapted from here.

Ingredients:

 1 chicken breast
100 gr flour
1.5 tablespoons vegetable oil
 1 spring onion, white part only, minced
 1 tablespoon lemon juice
 125 ml chicken stock
 1/2 teaspoon honey
 1 tablespoon unsalted butter, cut into small pieces
 1 tablespoon parsley, minced
 1/2 teaspoon lemon zest, finely zested

Direction:

  1. Use a sharp knife to slice the chicken breast in half. You should end up with two thin fillets that are mirror images of each other. If you don't have a sharp knife or aren't too confident with your knife skills, you can also put the breast in a large Ziploc bag and pound with a mallet until it's about 1/2" thick.

  2. Put the flour in a shallow bowl. Generously salt and pepper the chicken then, then dredge it in the flour to give it a light coating. Hold the chicken in the air and tap it a few times with your other hand to dust off excess flour. 

  3. Add the oil to a frying pan and heat over medium heat until the oil shimmers and is hot, but not smoking. Place two pieces of the chicken in the pan and fry undisturbed until you start seeing the edges start turning a tan color (about 2 minutes). Flip the chicken over then brown the other side. Transfer the cooked chicken to a plate, then fry the other two cutlets. 

  4. To make the sauce, drain out all but a tablespoon of oil, then add the minced scallions. Fry until soft and fragrant. Add the chicken stock, then let this boil down until there is almost no liquid left. Add the lemon juice and honey, then stir in the butter. Turn off the heat, then add the parsley and lemon zest. Pour the sauce of the chicken then serve immediately.

Ingredients:

1 1/2 cup water
3 eggs
100 gr minced pork
1 tsp sesame oil
salt and pepper
chopped spring onion to garnish

Directions:


  1. In a fry pan, cook minced pork, seasoned with salt and pepper. Set aside.
  2. Stir 3 eggs thoroughly and add sesame oil, salt, pepper and water.
  3. Put the cooked pork inside the egg.
  4. Steam for about 10 minutes. Turn off the heat after 10 minutes, let it sit in a steamer for another 6 - 7 minutes.
  5. Put some spring onion on the top. Serve.

Enjoy!

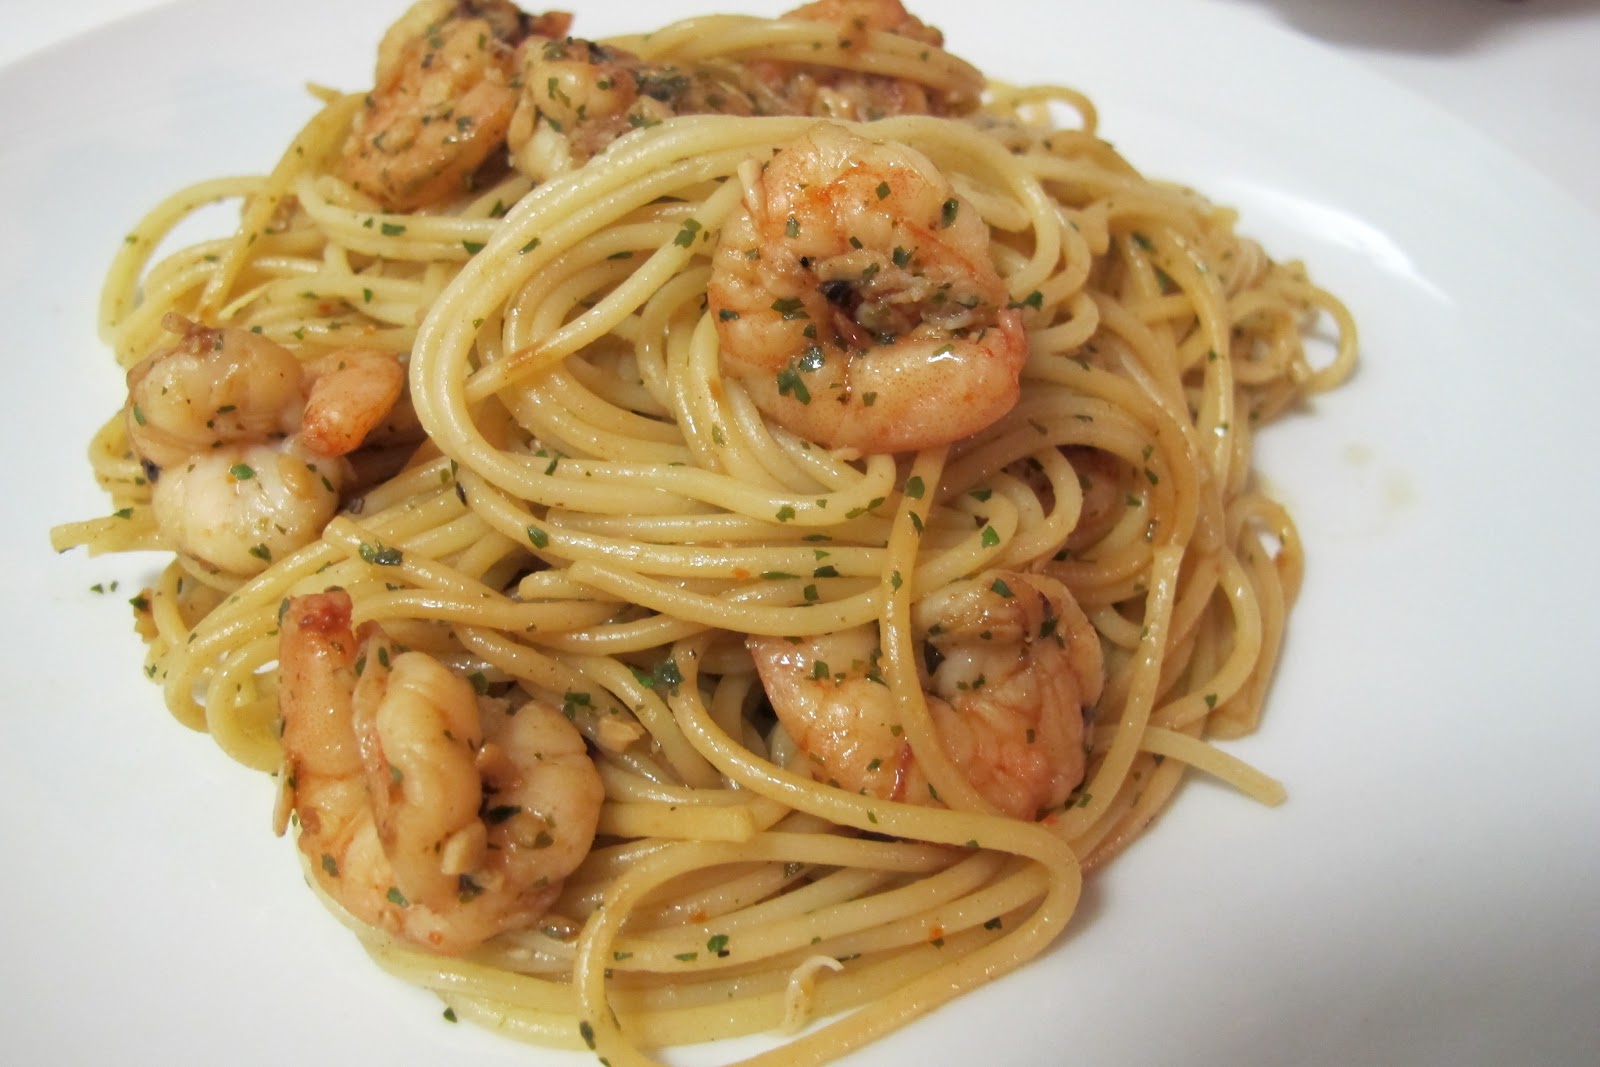
Ingredients:

vegetable oil
220 gr spaghetti
salt
2 tbs unsalted butter
1 1/2 tbs olive oil
1 tbs minced garlic
270 gr prawn
pinch black pepper
5gr parsley leaves
grated zest of 1/3 lemon
lemon juice (1/4 lemon)
pinch of chilli

Directions:

  1. Drizzle some oil in a large pot of boiling salted water, add 1 tsp of salt and the spaghetti.
  2. Cook for about 7 - 10 minutes or according to the directions on the package.
  3. Meanwhile, in another large pan, melt buter and olive oil over medium heat.
  4. Add garlic, saute for 1 minute.
  5. Add shrimp, 1/3 tbsp of salt and the pepper and leave until shrimp have just turned pink, about 5 minutes, stirring often.
  6. Remove from heat, add parsley, lemon zest, lemon juice and chilli flakes.
  7. Toss to combine
  8. When the pasta is done, drain the cooked pasta and then put it back in the pot. Immediately add the shrimp and sauce, toss well and serve.
Finally making my first nastar.
I can say it's such a mess.
Also, I don't know what I did wrong, but my cookies dough is not that perfect.
By the time all the ingredients were mixed, I just know that there was something not right.
And it's true... the dough is not like usual cookie dough, it's not that tight and thick as usual. Hmmmm....
Anyway, after it's cooled, it tastes like nastar should be.


Recipe from here
I still have leftover pineapple jam, maybe will try other recipe for the crust later.
Til the next post ;)
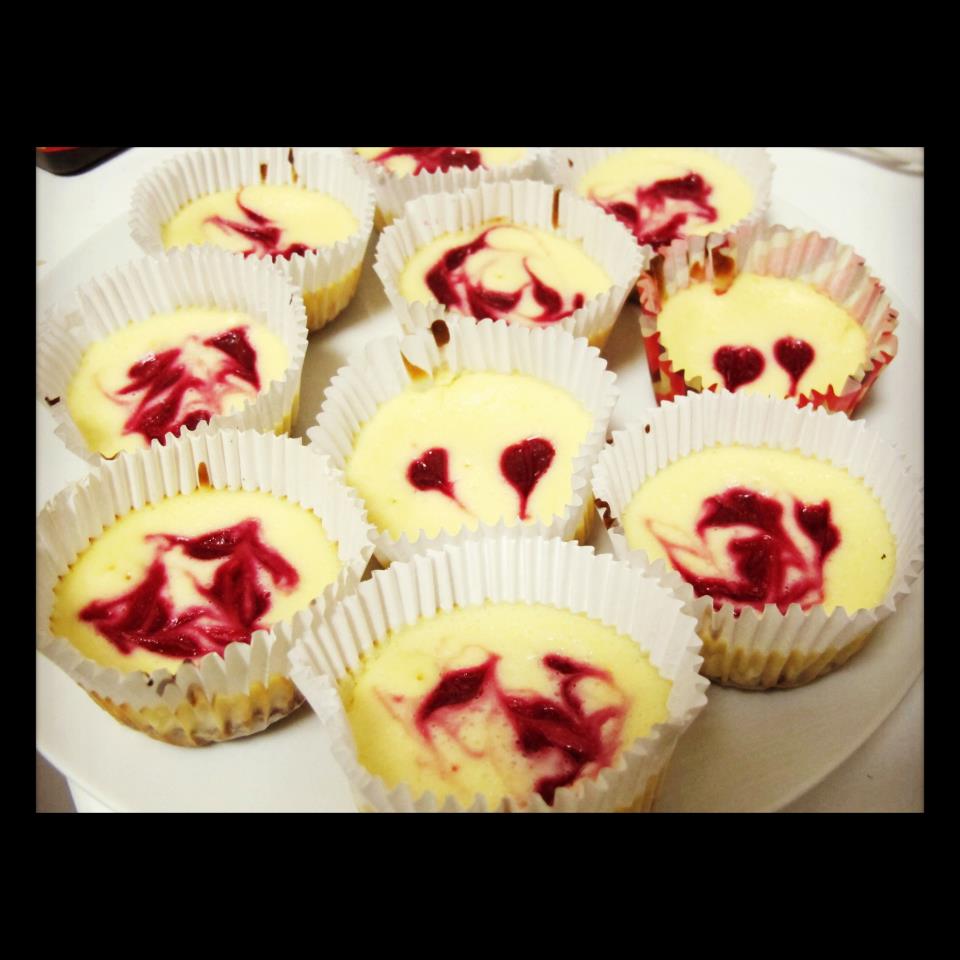
Made this on Friday and gave some to my friend for her birthday :)
Hope she likes it.


Original Recipe is from Martha Stewart but I only make half batch.
Still good and I got 15 cupcakes.

The Recipe: Raspberry Swirl Cheesecake Cupcakes
Yield: 32 cupcakes
Ingredients:
For the crust:
1½ cups graham cracker crumbs
4 tbsp. unsalted butter, melted
3 tbsp. sugar
For the topping:
6 oz. fresh raspberries
2 tbsp. sugar
For the filling:
2 lbs. cream cheese, at room temperature
1½ cups sugar
Pinch of salt
1 tsp. vanilla extract
4 large eggs, at room temperature
Directions:
Preheat the oven to 325˚ F.  Line cupcake pans with paper liners.  In a small bowl, combine the graham cracker crumbs, melted butter and sugar.  Stir together with a fork until well blended and all the dry ingredients are moistened.  Press 1 tablespoon of the mixture into the bottom of each cupcake liner.  Bake until just set, 5 minutes.  Transfer to a cooling rack.
To make the raspberry puree, combine the raspberries and sugar in a blender or food processor.  Process until smooth, then pour through a fine mesh sieve to remove the seeds.
To make the cheesecake, beat the cream cheese on medium-high speed in the bowl of an electric mixer until fluffy.  Blend in the sugar until smooth.  Mix in the salt and vanilla.  Beat in the eggs one at a time, mixing well after each addition.
To assemble, spoon 3 tablespoons of the cheesecake batter over the crust in each cupcake liner.  Dot a ½ teaspoon of the raspberry puree in a few dots over the cheesecake filling.  Use a toothpick or a wooden skewer to lightly swirl and create a marbled effect.
Bake until the filling is set, about 22 minutes, rotating the pans halfway through baking.  (They will look quite puffed initially but will return to normal quickly.)  Transfer to a wire cooling rack and let cool to room temperature.  Transfer to the refrigerator and let chill for at least 4 hours before serving.
Finally I make my coffee macaron after last time I made it, it was totally failed.
I found out that even I am using almond meal and icing sugar, I need to grind it again to make it perfectly smooth.
So I use blender as I don't have any food processor at the moment.
I blend the icing sugar, almond meal and also the instant coffee powder.


There was also an accident when making this.
The first batch, it fell to the ground when I tried to move around the pan to get it even.
I almost cry because the macarons are pretty, feet are perfect and skins are so smooth. 
Anyway, accident is accident, it can't go back so I need to let it go
T-T
Lucky I still have the second batch but not much.


Ingredients:

120 gr almond meal
120 gr icing sugar
120 gr caster sugar (divided into 2 portions)
2 tbsp instant coffee powder
100 gr eggs

Filling - Coffee Chocolate Ganache:

100 ml heavy cream
2-3 tbsp instant coffee powder
120 gr dark chocolate
25 gr unsalted butter

Directions: refer to the original recipe I use

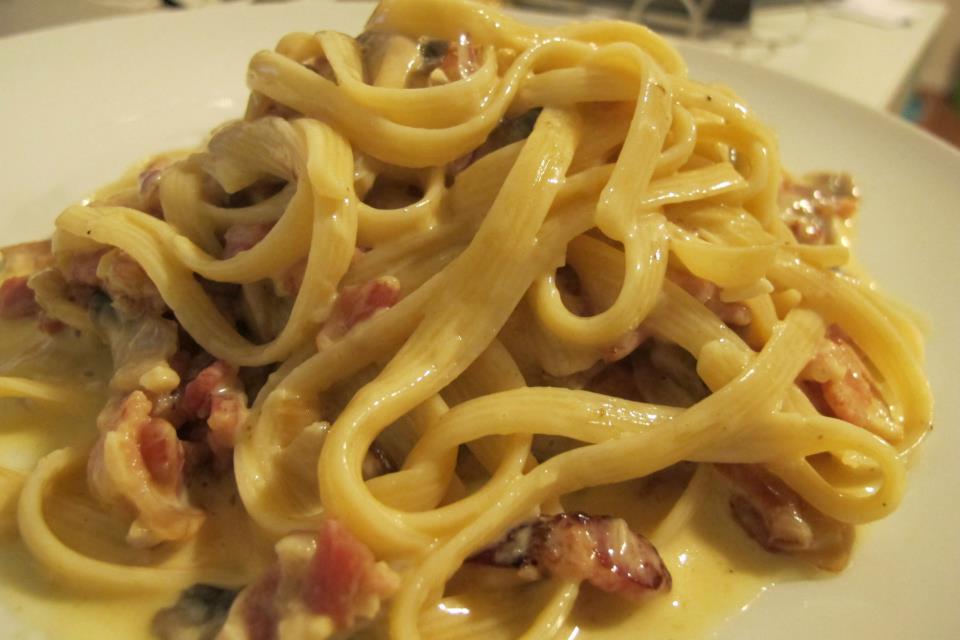
I've been craving for pasta lately... any pasta but maybe carbonara the most.
So I decided to find recipe instead of  buying it twice a week, draining my wallet.
Well, here it is!
Surprisingly this is good, and I notice it actually tastes better when it's not too hot. Weird!


Recipe - Make 3:

1-1/2 tsp olive oil
2 shallot, diced
1/2 large onion, peeled and sliced
250 gr bacon
2 clove garlic, chopped
250 gr fettuccine
2 egg yolks
125 ml cream
90gr parmesan cheese, shredded
salt and pepper

Direction:

1. Heat olive oil in a pan over medium heat. Fry shallots until softened. Stir in onion and bacon, and cook until bacon is evenly browned. Stir in garlic when bacon is about half done. Remove from heat.

2. Boil pasta in a lightly salted water. Cook for 8 to 10 minutes or until al dente. Drain pasta, then return it to the pan.

3. Whisk together egg yolk, cream and shredded parmesan. Pour the bacon mixture over the pasta, stir in the cream mixture. Season with salt and pepper.

And you're done!!! Enjoy!!
After making macaron for the past 2 weeks, I have a lot a lot of leftover egg yolks.
So try to find something using egg yolks and tadaaaaa....

Swiss roll! Trust me, it used load of egg yolks


I actually want to make the pattern on the top but totally forget after the batter is ready. lol!
If you put pattern, it should be looked like the below pic.
I made it when I was in Indo, pretty ya?


Anyway, recipe:

Ingredients:

9 egg yolks
2 eggs
6 gr emulsifier
1,5 gr vanilla powder
70 gr icing sugar
37,5 gr flour (I use Indonesian flour, kunci biru)
7,5 gr milk powder
75 gr butter, melted
12.5 gr vegetable oil
strawberry jam for filling

Direction:

Beat egg yolks and egg until bubbly.
Add icing sugar until it rises a bit, then add emulsifier and vanilla powder, mix well until the dough form a ribbon.
Add flour and milk powder with the medium speed until it is mixed well only, turn off the mixer.
Using spatula, put butter and oil, mix well.
Bake for 10-15 minutes in 200 degree Celcius.
When it's done, remove from the tray, spray the jam and roll straight away.
Leave it until it's cold before cutting it to pieces.

Lunch today for me, my housemate and my sister.
Happy overload! :)

Recipe from here but I don't make the dipping sauce, I just use normal tomato sauce and it's really good alrd.
Enjoy!


Sunday baking, another chocolate macaron batch.
But this time, I use chocolate ganache for the filling which is taste way way better :))

I use different recipe and it turns out not as smooth as before but the feet is much formed and better, so not sure what causing it. Still need to practice a lot to make it perfect.


Ingredients:

3 large egg whites
125 gr almond flour
125 gr icing sugar
25 gr cocoa powder
125 gr caster sugar, divided into 2 portions

Direction:
  1. Sift the almond flour, cocoa powder and icing sugar together until you get a very fine mixture.
  2. Place the egg whites in a bowl, begin beating the whites and sugar at low-medium speed until it gets bubbles, then add half of the sugar spoon by spoon. After 2 minutes, when the mixture starts to rise and holds its shape, increase the mixer speed. Continue beating at medium speed until firm peaks are obtained. Add the rest of the caster sugar and beat until all the sugar is dissolved.
  3. Add the dry mixture, using a spatula, gently fold the mixture until the dry ingredients are completely incorporated, taking care not to overmix. The batter should be smooth and glossy and have a lava-like consistency. It should form a ribbon when dripped from the spatula.
  4. Line two baking trays with baking paper. Fill a large piping bag half full with batter and, using a 2-cm (1/2 inch) tip, vertically pipe the mixture into small mounds about the size of walnuts. The batter should be fluid enough that the macarons slowly flatten themselves out. Tap the trays against a hard surface a couple of times to remove any air bubbles.
  5. Allow to the macarons to sit for 20 to 30 minutes until a “skin” forms and they are no longer wet when lightly touched.
  6. Bake at 160 degrees C (325 degrees F) for 12 to 14 minutes. Shells should be smooth and shiny, with the characteristic “foot” or ridge underneath. You can tell when they’re done by very lightly tapping the side with a knife or fork. The macaron top should not slide but remain firmly on its foot.
  7. Remove macarons from the oven. Cool for a few moments and remove with a lifter. They should come off easily.

For the filling, I use:

50 ml thickened cream
100 gr dark chocolate, chopped corsely

Direction:
  1. Warm the cream until it boils lightly.
  2. Put the chocolate in and stir until it mixed and it's glossy.
  3. Put in the fridge for several minutes until it is a bit solid so it won't be runny when you pipe it into the macaron.


Recipe:

Ingredients:

225gr plain flour
1/4 tsp salt
1 tsp baking soda
115 gr butter
100 brown sugar
1 egg
1/2 tsp vanilla essence
113 gr white sugar

Sift together the dry ingredients and set aside. Cream the butter and sugar in the bowl of an electric mixer using the paddle attachment. Add the egg and vanilla and beat until combined. Add the sifted dry ingredients and beat until just blended.

Heat the oven to 350 degrees. Form dough into 1 1/2 inch balls. Place each ball in a cup of a greased mini muffin tin. Bake 10 to 12 minutes until edges are browned and crackled, the centers will not be completely set. Remove the cookies from the oven and use shot glass to make a small, deep well in the center of each cookie and fill with your Nutella. Transfer cookies to a rack to cool completely.


As usual, weekend is my baking day.
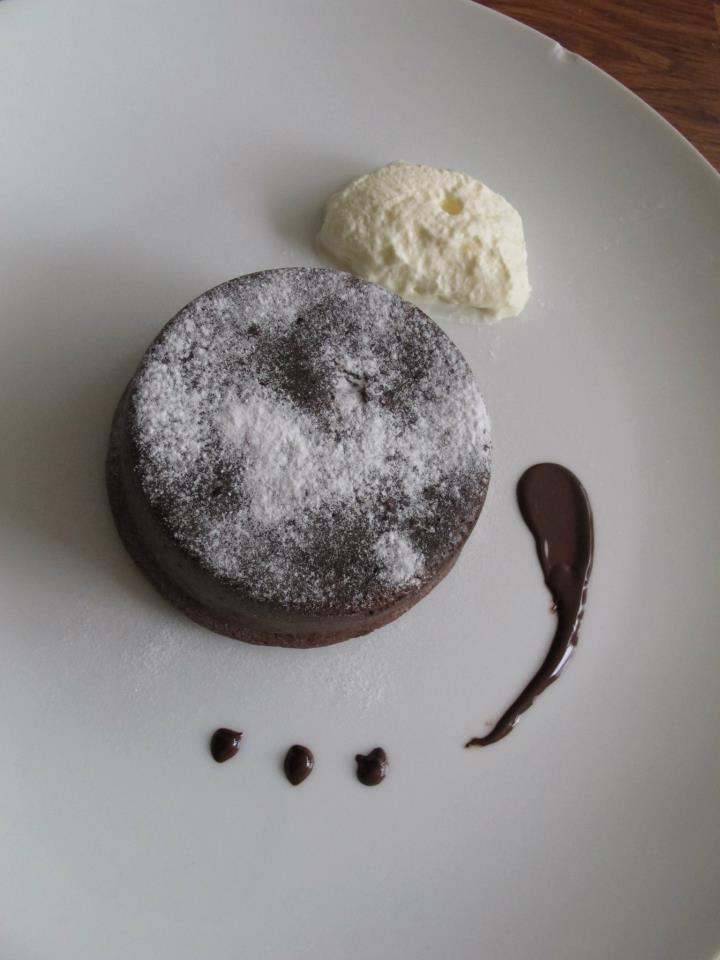
I baked this chocolate lava cake yesterday and it turned out really yummy!

Too bad I don't have ice cream or strawberry at home to complete this heavenly dessert
Anddd.... yesterday, I was neat enough to decor the plate... just need something more colorful :p


Recipe from here

Ingredients: 

2 large eggs
2 egg yolks
5 tbsp butter
3 tbsp caster sugar
100 gr dark chocolate bar
45gr plain flour
4tsp cocoa powder
pinch salt
1/8 tsp vanilla essence

Method:
  1. Butter the ramekin, put it in the large bowl, set aside.
  2. Melt butter and chocolate, put it aside.
  3. Mix the eggs and sugar until it changes to pale lemon color.
  4. Pour the chocolate and butter mix to the egg and sugar mix, stir well.
  5. Put flour and cocoa (sifted) into the batter and mix well.
  6. Add the salt and vanilla then mix well.
  7. Pour the batter into each ramekin, put in the fridge for 30 minutes.
  8. Bake in 217 degrees Celcius for 15 minutes.
ENJOY!
Okay, this is not as easy as I imagined.
Making chocolate chunk cookies. lol.

First fault, maybe the pastry flour I chose is not the correct one.
Second fault, I never make cookies before so I have no idea if the outside skin will be hard as soon as it's out of the oven and touch the air so... I simply over-bake it and it becomes really crunchy. Stupid stupid me!

It still tastes good and Thanks Goodness, the second batch turns out well after I learned from my mistakes not to over-bake it.

So here it is...


Recipe is from here, but I only make half batch and it's heappppsssssss already!!
Sunday brunch at home :))


Ingredients
  • 12 ea tater tots, cooked and crumbled
  • 1 tsp butter
  • 1/4 cup sweet onion, diced
  • 1 clove garlic, diced
  • 1/4 cup mozzarella cheese, shredded
  • 2 eggs
  • salt and pepper to taste
Instructions
  1. Preheat oven to 350f.  Preheat a small skillet over medium high heat.  
  2. Melt butter in the skillet and add the onion.  Cook 3-5 minutes, stirring occasionally, until starting to soften.
  3. Add the garlic and cook another minute, stirring occasionally. 
  4. Spray two small ramekin dishes with non-stick spray.  Divide the crumbled tots between the two dishes.
  5. Stir the onion, chile, garlic mixture into the dishes.  
  6. Top with the mozzarella.
  7. Crack an egg into each ramekin.  Season with salt and pepper.
  8. Bake in the oven on the middle rack for 5 minutes.
  9. Broil on high for 5-6 minutes or until the eggs are set.  
  10. Rest for 5 minutes before serving and warn diners that the ramekin is still hot.  (see pictures for alternate serving idea)
Well, it should look like below pic, but I am unable to take it out of the ramekin as I don't have non-stick spray. lol!

Good luck trying! :)


Labels: , , , 0 comments | |