Showing posts with label dessert. Show all posts
Hello... How r u people? Hope you all do great.

It's been way too long since I blogged last time.
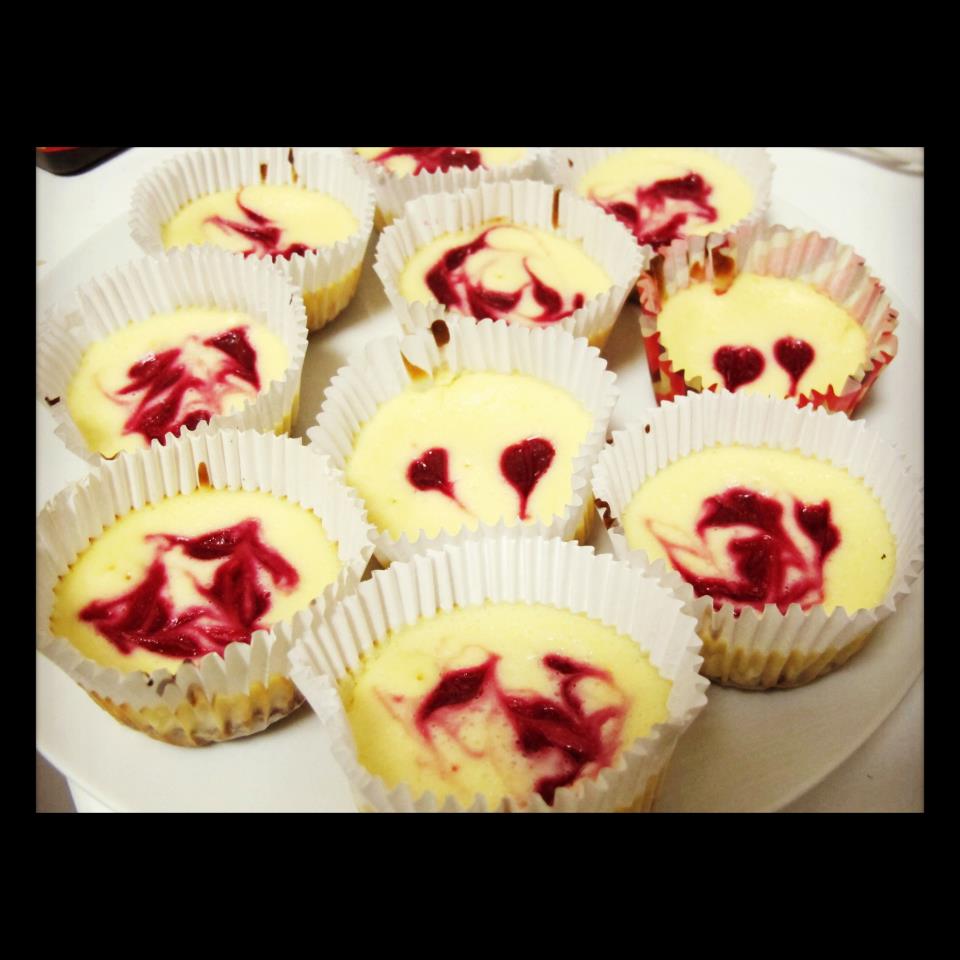
Days by days were quite busy. I almost baked everyday. If you were thinking that my business is going so great and popular that I need to bake everyday every time... NO, you are wrong. It doesn't always mean like that.

Macaron business is doing OK for now. Not like nothing at all but not THAT popular... yet. I wish *fingercross

Besides, I was busy traveling too. hahaha... Yes, I just went to Korea last month with friends in a tour. It was super fun, super exciting. Korean food was yummy, korean people were great and Korea itself... it's pretty. I don't mind going back there for the second, third or fourth time. A lot of things to be explored there and a lot of food you need to eat.

Anyway, right now I am thinking what I should do next for my business. How to make it grow? How to make it bigger and more popular? How to gain more market? Hence, I am thinking to move to another city, bigger city... but it's all just in mind and heart now. Nothing confirmed yet, especially the permission from my parents. Hope they agree... *fingercrossagain

Secondly, I made another macaron boxes which is prettier than before. I wish this can bring up the name and attract more people. If you want to see more about my macarons, you can visit its Instagram page (ID: cappellomacaron) or its Facebook page.

'til next time then :)


Proudly presents:


Follow us on instagram (id: cappellomacaron) OR
Facebook: D'Cappello
I've been practising macarons recently as I had a lot lot lot of leftover egg white from nastar.
I've been trying to make lemon, coffee and green tea macarons. 
And I am struggling with the lemon one. I made twice and both failed.
I tried using my powder and liquid food colouring and both of them still does not work right.
Now, I am really confused what kind of colouring I should use in macaron. 
In fact, if I buy the colour in-store here in Melbourne, it's damn expensive.

I assume once I get it right (using food colouring), the rest is easy.

Anyway, pictures are here.
The green tea one I use recipe from here but only use 1/3 of the recipe. Also, I found out that this one is really sweet. I should prob find the exact recipe that is not too sweet.


The coffee one, I used my old recipe, I forget from where but I love this recipe cos it's not too sweet.
Also, you can clearly see the difference. This time is much much better than the previous trial. Practice makes perfect.


And if you notice, this time, the macaron has few brown dots on the top (that's the coffee powder). It comes naturally, not sure how, even I did grind my almond meal, icing sugar together with the coffee powder twice and sift it twice. It's kinda cool tho, I love it!

Until next post then!
Second housewarming was done and no more. I am broke and tired of becoming a host.
Fiuhhh....

Here is the dessert I made. I was so lazy to cook main as usual so I ordered pizza for everyone.
Cos I still have some wonton skin leftover, I made them all to beef taco again.
Anyway, dessert is hazelnut chocolate cheesecake. I used nutella for the hazelnut and oreo for the base.
 I practically ate half of it and I couldn't finish it. Even my colleagues weren't surprised anymore, one of them said to another straight away 'You know her. She doesn't like sweet. She baked sweet stuff but doesn't eat it. Weirdo!'

Hahahhaa... I can't help but laughing. It's true but it's me. Or maybe because I have already made it, I have enough of it ;p

Recipe is from here.
It's pretty easy and simple and it is yummy.
Even I didn't finish mine, but I tasted it right?
And my colleagues had 2 each while another friend of mine came the day after and he ate 4. Yes, FOUR! Lol!


Last but not least, guess what they gave me as a gift? A coffee machine!!
Thank you. I am a happy girl.
But, I definitely need a bigger kitchen!!!!
Novi said, "People said you don't marry the person you can live with but marry the person you can't live without. And for me it's him, Ogi."

Happy wedding to Ogi and Novi!
It was a pleasure for me to attend your wedding and to witness this lifetime event.
Such an intimate, warm and tearful wedding.
Love the ambiance, the place, the food, the ceremony, the reception and everything...

Our wishes and prayers are with you :)


Well well well... Time to start baking again!

First time baking in this new year and first time baking in this new apartment.
Trying my new oven, and the result is not too bad but need a lot of settings at first tho.

I baked New York Cheesecake for my colleagues and will bring it tomorrow on Val's Day.
Why cheesecake? Cos they said they love my NY Cheesecake that much. So honoured!

Anyway, I use my usual recipe but this time I decided to put and follow the topping which is just a mixture of 1 cup sour cream, 2 tbsp caster sugar and 2tsp lemon juice.

I took a bite of the cake just to taste and I feel it's too sour-y. Hmmm...
Maybe it's too much of sour cream and lemon....
I hope inside will taste fine from the sugar mix. 
I am happy with the look tho, I learn something here.
The topping actually makes the top edge does not look burnt as my previous cheesecake, but the taste? Still, I wonder why my very 1st cake in every new recipe always taste better. Sighhhh!
When it comes to baking, I bake into perfection so I am not that happy this time.
Need to edit my recipe then.... 

I am thinking to add something on the top so that it gives the sweet taste and make it not too sour-y but poor me my fridge is just empty at the moment :(

Anw, hope my colleagues will like it!

Finally making my first nastar.
I can say it's such a mess.
Also, I don't know what I did wrong, but my cookies dough is not that perfect.
By the time all the ingredients were mixed, I just know that there was something not right.
And it's true... the dough is not like usual cookie dough, it's not that tight and thick as usual. Hmmmm....
Anyway, after it's cooled, it tastes like nastar should be.


Recipe from here
I still have leftover pineapple jam, maybe will try other recipe for the crust later.
Til the next post ;)
Another ice cream sandwich for Sunday.
In fact, it still sits in my freezer until now... hahaha...
I just like to make it but don't want to eat it.
Lucky, it's easy. I used ready stuff for everything.

Ingredients:

Marie biscuit, Cookies and cream ice cream, dark chocolate (melted), grounded peanuts.
And you just need to assemble every thing together.
Pretty easy huh?


Made this on Friday and gave some to my friend for her birthday :)
Hope she likes it.


Original Recipe is from Martha Stewart but I only make half batch.
Still good and I got 15 cupcakes.

The Recipe: Raspberry Swirl Cheesecake Cupcakes
Yield: 32 cupcakes
Ingredients:
For the crust:
1½ cups graham cracker crumbs
4 tbsp. unsalted butter, melted
3 tbsp. sugar
For the topping:
6 oz. fresh raspberries
2 tbsp. sugar
For the filling:
2 lbs. cream cheese, at room temperature
1½ cups sugar
Pinch of salt
1 tsp. vanilla extract
4 large eggs, at room temperature
Directions:
Preheat the oven to 325˚ F.  Line cupcake pans with paper liners.  In a small bowl, combine the graham cracker crumbs, melted butter and sugar.  Stir together with a fork until well blended and all the dry ingredients are moistened.  Press 1 tablespoon of the mixture into the bottom of each cupcake liner.  Bake until just set, 5 minutes.  Transfer to a cooling rack.
To make the raspberry puree, combine the raspberries and sugar in a blender or food processor.  Process until smooth, then pour through a fine mesh sieve to remove the seeds.
To make the cheesecake, beat the cream cheese on medium-high speed in the bowl of an electric mixer until fluffy.  Blend in the sugar until smooth.  Mix in the salt and vanilla.  Beat in the eggs one at a time, mixing well after each addition.
To assemble, spoon 3 tablespoons of the cheesecake batter over the crust in each cupcake liner.  Dot a ½ teaspoon of the raspberry puree in a few dots over the cheesecake filling.  Use a toothpick or a wooden skewer to lightly swirl and create a marbled effect.
Bake until the filling is set, about 22 minutes, rotating the pans halfway through baking.  (They will look quite puffed initially but will return to normal quickly.)  Transfer to a wire cooling rack and let cool to room temperature.  Transfer to the refrigerator and let chill for at least 4 hours before serving.
Finally I make my coffee macaron after last time I made it, it was totally failed.
I found out that even I am using almond meal and icing sugar, I need to grind it again to make it perfectly smooth.
So I use blender as I don't have any food processor at the moment.
I blend the icing sugar, almond meal and also the instant coffee powder.


There was also an accident when making this.
The first batch, it fell to the ground when I tried to move around the pan to get it even.
I almost cry because the macarons are pretty, feet are perfect and skins are so smooth. 
Anyway, accident is accident, it can't go back so I need to let it go
T-T
Lucky I still have the second batch but not much.


Ingredients:

120 gr almond meal
120 gr icing sugar
120 gr caster sugar (divided into 2 portions)
2 tbsp instant coffee powder
100 gr eggs

Filling - Coffee Chocolate Ganache:

100 ml heavy cream
2-3 tbsp instant coffee powder
120 gr dark chocolate
25 gr unsalted butter

Directions: refer to the original recipe I use

Sunday baking, another chocolate macaron batch.
But this time, I use chocolate ganache for the filling which is taste way way better :))

I use different recipe and it turns out not as smooth as before but the feet is much formed and better, so not sure what causing it. Still need to practice a lot to make it perfect.


Ingredients:

3 large egg whites
125 gr almond flour
125 gr icing sugar
25 gr cocoa powder
125 gr caster sugar, divided into 2 portions

Direction:
  1. Sift the almond flour, cocoa powder and icing sugar together until you get a very fine mixture.
  2. Place the egg whites in a bowl, begin beating the whites and sugar at low-medium speed until it gets bubbles, then add half of the sugar spoon by spoon. After 2 minutes, when the mixture starts to rise and holds its shape, increase the mixer speed. Continue beating at medium speed until firm peaks are obtained. Add the rest of the caster sugar and beat until all the sugar is dissolved.
  3. Add the dry mixture, using a spatula, gently fold the mixture until the dry ingredients are completely incorporated, taking care not to overmix. The batter should be smooth and glossy and have a lava-like consistency. It should form a ribbon when dripped from the spatula.
  4. Line two baking trays with baking paper. Fill a large piping bag half full with batter and, using a 2-cm (1/2 inch) tip, vertically pipe the mixture into small mounds about the size of walnuts. The batter should be fluid enough that the macarons slowly flatten themselves out. Tap the trays against a hard surface a couple of times to remove any air bubbles.
  5. Allow to the macarons to sit for 20 to 30 minutes until a “skin” forms and they are no longer wet when lightly touched.
  6. Bake at 160 degrees C (325 degrees F) for 12 to 14 minutes. Shells should be smooth and shiny, with the characteristic “foot” or ridge underneath. You can tell when they’re done by very lightly tapping the side with a knife or fork. The macaron top should not slide but remain firmly on its foot.
  7. Remove macarons from the oven. Cool for a few moments and remove with a lifter. They should come off easily.

For the filling, I use:

50 ml thickened cream
100 gr dark chocolate, chopped corsely

Direction:
  1. Warm the cream until it boils lightly.
  2. Put the chocolate in and stir until it mixed and it's glossy.
  3. Put in the fridge for several minutes until it is a bit solid so it won't be runny when you pipe it into the macaron.


Recipe:

Ingredients:

225gr plain flour
1/4 tsp salt
1 tsp baking soda
115 gr butter
100 brown sugar
1 egg
1/2 tsp vanilla essence
113 gr white sugar

Sift together the dry ingredients and set aside. Cream the butter and sugar in the bowl of an electric mixer using the paddle attachment. Add the egg and vanilla and beat until combined. Add the sifted dry ingredients and beat until just blended.

Heat the oven to 350 degrees. Form dough into 1 1/2 inch balls. Place each ball in a cup of a greased mini muffin tin. Bake 10 to 12 minutes until edges are browned and crackled, the centers will not be completely set. Remove the cookies from the oven and use shot glass to make a small, deep well in the center of each cookie and fill with your Nutella. Transfer cookies to a rack to cool completely.


I did it! Finally I tried to make macaron. Fiuhhh...
It was such a messy process. Everything needs to be extremely clean or else your macaron won't be perfect.

But at last, I am happy with the results.
For the first time in making macaron, I am happy how it turns out.
It does not have the very perfect perfect feet but at least I get some in it :)

I will try to make again some more later until it is perfect.


I used the recipe from here


As usual, weekend is my baking day.
I baked this chocolate lava cake yesterday and it turned out really yummy!

Too bad I don't have ice cream or strawberry at home to complete this heavenly dessert
Anddd.... yesterday, I was neat enough to decor the plate... just need something more colorful :p


Recipe from here

Ingredients: 

2 large eggs
2 egg yolks
5 tbsp butter
3 tbsp caster sugar
100 gr dark chocolate bar
45gr plain flour
4tsp cocoa powder
pinch salt
1/8 tsp vanilla essence

Method:
  1. Butter the ramekin, put it in the large bowl, set aside.
  2. Melt butter and chocolate, put it aside.
  3. Mix the eggs and sugar until it changes to pale lemon color.
  4. Pour the chocolate and butter mix to the egg and sugar mix, stir well.
  5. Put flour and cocoa (sifted) into the batter and mix well.
  6. Add the salt and vanilla then mix well.
  7. Pour the batter into each ramekin, put in the fridge for 30 minutes.
  8. Bake in 217 degrees Celcius for 15 minutes.
ENJOY!
Finally I have a chance to make this popular cake, my RAINBOW!
But instead of making the whole cake, I make the cupcake version.

They are so pretty and cute, aren't they?
And it tastes good as well :)


Recipe!

Ingredients:
1/2 cup butter, at room temperature
1 and 3/4 cups plain flour, sifted
150 gr sugar
2 and 1/2 tsp baking powder
1/2 tsp salt
1 egg
3/4 cup milk
1/2 tsp vanilla essence
food coloring (red, blue, green and yellow)

Directions:

  1. Put butter in a mixing bowl.
  2. Sift dry ingredients together in separate bowl.
  3. With a mixer, mix the dry ingredients in slowly with the butter.
  4. Add 1/2 cup milk and the egg to the dry ingredients and beat until flour is fully moistened.
  5. Add the remaining milk, vanilla and beat for about another minute.
  6. Evenly divide the batter into six small bowls. Dye each bowl of batter a rainbow color; Purple – 9 red and 6 blue drops, Blue – 12 drops, Green – 12 drops, Yellow – 12 drops, Orange – 12 yellow and 4 red drops and Red– 18 drops.
  7. Line 12 muffin pan wells with baking cups. Evenly distribute the purple batter among the cups, then the blue, green, yellow, orange and then top with red, following the order listed. As you go, gently spread each layer of batter with the back of a spoon to cover the color underneath.
  8. Bake at 375F for 15 to 18 minutes or until a cake tester or toothpick inserted into the middle of a cupcake comes out clean.

Finally I make something Red Velvet.
This one is Red Velvet Cake Pops.
The funny thing is I never taste red velvet cake or cupcake before, so when I make this today.. I take a small piece, taste it and I was like 'Is the taste should be like this? I don't even know if the taste is correct.'

Stupid enough? hahaha...
Lucky I have a friend living in my place at the moment, so when she wakes up I asked her to taste and she said 'yes, it's supposed to be like this'.
Great! Relieved!


Recipe: Bakerella

It's supposed to be dipped all in the chocolate but I ran out of chocolate and too tired to do it one by one so I just decorate some of them like a chocolate cage. LOL!

Apparently, I am not a decorating person. haha...
I am seeing this Master Chef Season 4 Episode 14 about the Pressure Test.
The 3 candidates need to make Peter Gilmore's Signature Eight-Texture Chocolate Cake.
Geez! I am watching it, I am saliva-ing, I am amazed, I am shocked, I want to eat it and I want to make it (but forget the last one).

It is so cool!! So awesome!
Like what he said in Master Chef episode:

"It was 7 main elements and there is one more, the 8th texture... the hot chocolate ganache to be served in the front of the guest as the key. When we put the ganache on the center of the cake, we went, and waited a little while... some magical happens."

God! Look so yummy!

Please do look at the pic, the video in youtube and the full video on how to make it in Master chef.

*pic from: Masterchef


I think I am obsessed with Red Velvet.. for this moment.
I know red velvet has been popular for ages but I haven't really made this one of my favorite cakes.
But, don't know why I just like it recently. Probably just the beautiful red color.

Well, I found some good recipes for different kind of desserts made from red velvet.
So, I will definitely try make some later when my holiday ends :))

Wish me luck! Ciao!

red velvet valentine's cupcake

red velvet cake balls

red velvet cupcake

red velvet macaroons

NB: pics taken from pinterest

Hi hi hi...
I have office team xmas party tonight in my apartment.
It's a potluck party so everyone needs to cook and bring their own country dish.
I am given a task to prepare the dessert and am planning to make martabak manis a.k.a terang bulan as it's Indonesian signature dish.
But, who knows there will be something ruining it... I make another dessert.

New York Baked Cheesecake! Tadaaaa!!!
I actually randomly picked this as I don't know what to make.
Egg tart is boring so I want to try something new.
My choices are between cheesecake or macaroon.
I compared both recipes, ingredients and how to make it... forget about macaroon.
It's so troublesome, in fact that if this does not turn well, I will be screwed.
So, I decided to make cheesecake and will try to make macaroon later on.

Here is the recipe:

Crust:
250gr biscuit
125gr butter

Filling:
750 gr cream cheese - softened
225gr cup caster sugar
3 eggs
169gr cup sour cream
1/4 cup lemon juice
lemon grind

Process:
Pre-heat the oven at 180 degrees Celcius.
1. Melt butter, ground biscuit. Mix both well, put it in the fridge for 30 minutes.
2. Mix cream cheese, lemon grind and sugar until it is mixed well.
3. Add egg one at a time and mix it well each time.
4. Add sour cream and lemon juice, mix it well.
5. Take the crust from the fridge, pour the filling on the top of the crust.
6. Bake in the oven at 180 degrees Celcius for 1 hour and 15 minutes. Leave it in the oven (door closed) for another 20-30 minutes.
7. Once it is cooled down and set, take from the oven, leave it for 15 minutes to cool down and put it in the fridge for 3 hours or overnight.

The results?


I burnt the edge a bit cos I change the oven with fan at the end (don't do this). It tastes perfect though, not bitter at all. Fiuhhh....


Not that hard, isn't it?
Enjoy and try it at home.